
Looking to get fit but don’t want to break the bank on expensive gym equipment? Look no further! In this article, we will show you how to make your own dumbbells at home, all while sticking to a budget. Say goodbye to costly fitness equipment and hello to innovative DIY solutions. Whether you’re a beginner or a seasoned fitness enthusiast, our step-by-step guide will have you pumping iron in no time, without emptying your wallet. So get ready to flex those creative muscles and start sculpting your dream physique with DIY dumbbells on a budget!
Try This 12-week Yoga Burn Challenge
1. Choosing the Right Materials for DIY Dumbbells
When it comes to making your own dumbbells, selecting the right materials is crucial. Not only will the choice of filling and container affect the weight and functionality of your DIY dumbbells, but it will also impact your safety and comfort during workouts. In this section, we will explore the different options for dumbbell filling, containers, and grip choices, helping you make informed decisions for your DIY project.
1.1 Selecting the Dumbbell Filling
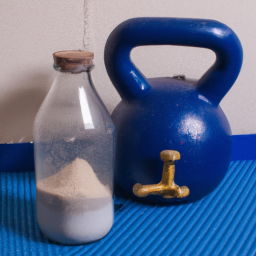
One of the first considerations when making DIY dumbbells is the filling. The filling not only determines the weight of the dumbbell but also affects its stability and versatility. There are three main options for dumbbell filling: sand, water, and concrete.
Sand-filled dumbbells are a popular choice due to their ease of use and accessibility. Sand provides a stable and evenly distributed weight, making it suitable for various workouts. Water-filled dumbbells offer a lighter and more dynamic option, as you can adjust the weight by adding or removing water. Concrete-filled dumbbells, on the other hand, provide maximum weight and durability, making them ideal for heavy lifting.
1.2 Choosing the Container for the Dumbbell
The container for your DIY dumbbells holds the filling securely and ensures proper weight distribution. When choosing a container, consider factors such as durability, size, and shape. Some common options include plastic bottles, PVC pipes, and sturdy buckets.
Plastic bottles, such as empty milk jugs, are an affordable and easily accessible choice. They are lightweight and come in various sizes, allowing you to customize your dumbbell weight. PVC pipes offer a more rigid and sturdy option, making them suitable for heavier dumbbells. Sturdy buckets, like those used for construction or gardening, provide ample space for larger fillings and can withstand heavy use.
1.3 Considering the Grip Options
The grip of your DIY dumbbells directly affects your comfort and control during workouts. It is essential to choose a grip that suits your hand size and provides sufficient friction to prevent slipping. There are various grip options available for DIY dumbbells, such as foam padding, athletic tape, or rubber coatings.
Foam padding is a common choice for providing a comfortable grip and reducing strain on your hands. With its soft and cushioned texture, foam padding helps absorb sweat and provides a secure grip. Athletic tape, when wrapped tightly around the dumbbell handles, forms a durable and non-slip grip. Rubber coatings, either pre-cut or applied manually, offer a firm grip and added durability, especially for heavier dumbbells.
Try This 12-week Yoga Burn Challenge
2. Option 1: Sand-filled DIY Dumbbells
Sand-filled dumbbells are a versatile and cost-effective option for DIY enthusiasts. They provide stability and allow for customizable weight options, making them suitable for a wide range of exercises. In this section, we will guide you through the materials needed, step-by-step instructions, and tips for enhancing sand-filled dumbbells.
2.1 Materials Needed for Sand-filled Dumbbells
To make sand-filled dumbbells, you will need the following materials:
- Empty plastic bottles or sturdy containers
- Sand or fine gravel
- Funnel (optional)
- Measuring scale or cup (optional, for precise weight)
2.2 Step-by-Step Guide to Making Sand-filled Dumbbells
Here is a step-by-step guide to creating your sand-filled dumbbells:
- Gather empty plastic bottles or containers of the desired size and weight.
- Clean the bottles thoroughly to ensure no residue or contaminants are present.
- Calculate the weight you want your dumbbells to be by mixing sand and water.
- Use a funnel to pour the sand into each bottle until the desired weight is reached.
- Ensure the bottles are tightly sealed to prevent any sand leakage during use.
- Test the weight and stability of your dumbbells before incorporating them into your workouts.
2.3 Tips for Enhancing Sand-filled Dumbbells
To enhance your sand-filled dumbbell experience, consider the following tips:
- Add small pebbles or weights inside the bottles to create adjustable weights.
- Wrap the handles with foam padding or athletic tape for a comfortable grip.
- Label the dumbbells with their respective weights to easily track your progress.
- Regularly check the bottles for any signs of wear or leakage to ensure safety.
3. Option 2: Water-filled DIY Dumbbells
Water-filled dumbbells provide a unique and adjustable option for your DIY fitness equipment. With the ability to customize the weight by simply adding or removing water, they are perfect for those who prefer varied resistance levels. In this section, we will outline the materials needed, step-by-step instructions, and safety tips for water-filled dumbbells.
3.1 Materials Needed for Water-filled Dumbbells
To make water-filled dumbbells, gather the following materials:
- Empty plastic bottles or sturdy containers
- Water source (tap water or bottled water)
- Funnel (optional)
3.2 Step-by-Step Guide to Making Water-filled Dumbbells
Follow these steps to create your water-filled dumbbells:
- Select the desired size and weight of your dumbbells.
- Clean the plastic bottles thoroughly to ensure hygiene.
- Fill each bottle with the desired amount of water using a funnel if needed.
- Seal the bottles securely to prevent any leakage or spillage.
- Test the weight and stability of your water-filled dumbbells before incorporating them into your workouts.
3.3 Tips for Using Water-filled Dumbbells Safely
Here are some tips to ensure safe and effective use of water-filled dumbbells:
- Consider the weight of the dumbbells before starting your workout to avoid strain or injury.
- Fully seal the bottles to prevent any water leakage that could lead to accidents.
- Regularly check the bottles for any signs of wear or damage that may compromise their integrity.
- Start with lower weights and gradually increase the water level to challenge yourself over time.
- Be mindful of your grip, as a wet or slippery surface may require additional measures, such as using gloves or rubber coatings.
4. Option 3: Concrete-filled DIY Dumbbells
Concrete-filled dumbbells offer the highest weight capacity and durability, making them suitable for heavy lifting and strength training. While they require more effort to create, they provide a long-lasting and sturdy option for your DIY workout equipment. In this section, we will discuss the materials needed, step-by-step instructions, and tips for strength and safety with concrete-filled dumbbells.
4.1 Materials Needed for Concrete-filled Dumbbells
To make concrete-filled dumbbells, gather the following materials:
- PVC pipes or sturdy containers
- Concrete mix
- Water
- Mixing container
- Funnel (optional)
- Measuring cup or scale (optional, for precise weight)
- Reinforcement (optional, such as rebar or metal rods)
4.2 Step-by-Step Guide to Making Concrete-filled Dumbbells
Follow these steps to create your concrete-filled dumbbells:
- Select the appropriate size and length of PVC pipes or containers to serve as the outer shell of your dumbbells.
- Cut the PVC pipes or containers to the desired length, keeping in mind the handle length and weight distribution.
- Mix the concrete according to the instructions provided on the packaging.
- Use a funnel to pour the concrete mixture into the PVC pipes or containers, filling them to the desired weight.
- Optional: Insert reinforcement such as rebar or metal rods to enhance the strength and stability of the dumbbells.
- Allow the concrete to cure according to the recommended time on the concrete mix packaging.
- Test the weight and stability of your concrete-filled dumbbells before incorporating them into your workouts.
4.3 Tips for Strength and Safety with Concrete-filled Dumbbells
To ensure strength and safety when using concrete-filled dumbbells, consider the following tips:
- Use a sturdy outer shell, such as thick PVC pipes or containers, to prevent any cracks or breakage.
- Allow the concrete to cure fully before using the dumbbells to ensure maximum strength.
- Consider reinforcing the concrete with rebar or metal rods for added stability, especially for heavier dumbbells.
- Clean and inspect the dumbbells regularly to check for any signs of wear, cracks, or deterioration that may compromise their integrity.
- When performing exercises with the concrete-filled dumbbells, maintain proper form and avoid rapid or jerky movements to prevent strain or injury.
5. Safety Precautions for DIY Dumbbells
While DIY dumbbells can be a cost-effective and convenient option, it is crucial to prioritize safety during your workouts. By following some essential safety precautions, you can minimize the risk of injuries and ensure a productive and enjoyable fitness routine. In this section, we will discuss warm-up and proper form, regular inspections and maintenance, and protective gear and equipment.
5.1 Warm-up and Proper Form
Before using your DIY dumbbells, it is essential to warm up your muscles and prepare your body for exercise. Spend at least 5-10 minutes engaging in light cardio activities, such as jogging or jumping jacks, to increase your heart rate and promote blood flow to your muscles. Additionally, focus on using proper form and technique during exercises to avoid unnecessary strain or injuries. If you are new to strength training, consider seeking guidance from a fitness professional to ensure you are performing exercises correctly.
5.2 Regular Inspections and Maintenance
Regular inspections and maintenance of your DIY dumbbells are crucial for safety and longevity. Routinely check the containers or shells for any signs of wear, cracks, or leakage. Ensure that the fillings are securely sealed, and there are no loose components that may pose a risk during exercises. If you notice any damage or deterioration, discontinue use and replace the affected parts immediately. Additionally, clean the dumbbells regularly to remove sweat, dirt, or debris that might affect their performance or grip.
5.3 Protective Gear and Equipment
To further enhance safety during your DIY dumbbell workouts, consider using appropriate protective gear and equipment. Wearing workout gloves can help improve grip and reduce the risk of blisters or calluses on your hands. Additionally, invest in a mat or suitable flooring to create a stable and non-slip surface for your exercises. If you plan to perform high-intensity movements or exercises that require additional support, such as heavy bench presses, consider using a weightlifting belt to protect your lower back and core muscles.
6. DIY Dumbbells vs. Commercial Dumbbells
When deciding between DIY dumbbells or commercially available ones, several factors come into play. Both options have their advantages and limitations, and it ultimately depends on your preferences, budget, and specific fitness goals. In this section, we will compare DIY dumbbells and commercial dumbbells in terms of cost, durability, customizability, and equipment availability.
6.1 Cost Comparison
One of the primary benefits of DIY dumbbells is cost savings. By using readily available materials, such as plastic bottles or PVC pipes, you can make your dumbbells at a fraction of the cost of commercial ones. On the other hand, commercial dumbbells often come in various weight increments and designs, catering to different needs and preferences. While they may be pricier upfront, commercially available dumbbells offer a wider range of options and are often more durable in the long run.
6.2 Durability and Longevity
In terms of durability and longevity, commercial dumbbells often have an edge over DIY alternatives. Commercial dumbbells are specifically designed and manufactured using high-quality materials, ensuring their longevity even with regular use. DIY dumbbells, although cost-effective, may be more susceptible to wear and tear, especially if the containers or shells are not as sturdy. Proper maintenance and regular inspections can help prolong the lifespan of DIY dumbbells, but they may not withstand heavy or intense workouts as well as commercial options.
6.3 Customization and Variability
Customizability is an area where DIY dumbbells often excel. With DIY options, you have the freedom to adjust the weight, grip, and design to suit your specific needs and preferences. For those looking for a personalized workout experience, DIY dumbbells offer endless customization possibilities. Commercial dumbbells, while pre-designed and fixed in weight increments, still provide a wide range of options to cater to different fitness levels and exercise preferences.
6.4 Equipment Availability and Flexibility
Commercial dumbbells offer the advantage of equipment availability and flexibility. Gyms and fitness stores often have a wide range of commercial dumbbell options, making it easier to find and purchase the desired weight increments or designs. However, DIY dumbbells allow you to create your workout equipment without relying on external sources or availability. This can be especially beneficial if you prefer to work out from home or if you enjoy the process of building your fitness equipment.
7. Creative Ideas for DIY Dumbbell Designs
While the primary focus of DIY dumbbells is functionality and affordability, there’s no reason why you can’t add a touch of creativity to your creations. In this section, we will explore some creative ideas to personalize and enhance the appearance of your DIY dumbbells.
7.1 Decorative Covers or Wraps
If you want to add a touch of style to your DIY dumbbells, consider using decorative covers or wraps. You can use materials such as fabric, adhesive paper, or colorful tapes to create eye-catching designs. Customizing the appearance of your DIY dumbbells not only adds a personal touch but can also serve as motivation during your workouts.
7.2 Innovations for Adjustable Weight
While DIY dumbbells can provide adjustable weights through adjustable fillings, there are other innovative approaches to achieve the same goal. You can explore options like attaching magnets to the dumbbell shell and using metal plates as interchangeable weight options. By incorporating adjustable weight mechanisms, you can customize the weight of your dumbbells more conveniently and precisely.
7.3 Ergonomic Handles and Grips
To enhance comfort and grip during your workouts, you can experiment with ergonomic handle designs and grips. You can use foam tubing, rubber coatings, or textured materials to create handles that fit your hand shape perfectly and provide optimal grip. By focusing on ergonomic designs, you can make your DIY dumbbells even more comfortable and enjoyable to use.
8. DIY Dumbbell Exercises and Workouts
Now that you have your DIY dumbbells ready, it’s time to put them to good use. In this section, we will provide you with a full-body dumbbell workout routine, targeted muscle group exercises, and ideas for incorporating dumbbells into high-intensity interval training (HIIT) workouts.
8.1 Full-Body Dumbbell Workout Routine
A full-body dumbbell workout routine allows you to engage multiple muscle groups in one session. Here is a sample workout routine you can follow:
- Warm-up: 5-10 minutes of light cardio (jumping jacks, jogging, or dynamic stretches)
- Exercise 1: Goblet Squats (3 sets of 10-12 reps)
- Exercise 2: Dumbbell Bench Press (3 sets of 8-10 reps)
- Exercise 3: Bent-Over Rows (3 sets of 10-12 reps)
- Exercise 4: Dumbbell Shoulder Press (3 sets of 8-10 reps)
- Exercise 5: Dumbbell Lunges (3 sets of 10-12 reps per leg)
- Exercise 6: Bicep Curls (3 sets of 10-12 reps)
- Exercise 7: Tricep Dips (3 sets of 8-10 reps)
- Exercise 8: Russian Twists (3 sets of 10-12 reps)
Remember to begin with lighter weights and gradually increase the weight as you progress. Take short breaks (30-60 seconds) between each set to allow for recovery.
8.2 Targeted Muscle Group Exercises
In addition to a full-body workout, you can also target specific muscle groups with your DIY dumbbells. Here are a few exercises to focus on different areas:
- Chest: Dumbbell Chest Flyes
- Back: Bent-Over Rows
- Shoulders: Dumbbell Shoulder Press
- Biceps: Alternating Dumbbell Curls
- Triceps: Overhead Tricep Extension
- Legs: Goblet Squats or Dumbbell Lunges
- Core: Russian Twists or Dumbbell Woodchoppers
By incorporating targeted exercises into your workout routine, you can strengthen and develop specific muscle groups more effectively.
8.3 Incorporating Dumbbells into HIIT Workouts
High-intensity interval training (HIIT) is a form of exercise that combines short bursts of intense activity with brief periods of rest. Adding dumbbells to your HIIT workouts can increase the intensity and add resistance. Here’s an example of a dumbbell HIIT workout:
- Warm-up: 5-10 minutes of light cardio (jumping jacks, jogging, or dynamic stretches)
- Exercise 1: Dumbbell Squat Jumps (30 seconds)
- Rest: 15 seconds
- Exercise 2: Dumbbell Renegade Rows (30 seconds)
- Rest: 15 seconds
- Exercise 3: Dumbbell Burpees (30 seconds)
- Rest: 15 seconds
- Exercise 4: Dumbbell Thrusters (30 seconds)
- Rest: 15 seconds
- Repeat the circuit for a total of 3-4 rounds
Remember to choose weights that allow you to maintain proper form and complete the exercises with intensity. Listen to your body and adjust the weights or rest periods as needed.
9. Making Progress with DIY Dumbbells
As with any fitness journey, progression is key to achieving your goals and maintaining motivation. In this section, we will discuss setting goals and tracking progress, gradual weight increase, and the importance of cross-training and supplementing.
9.1 Setting Goals and Tracking Progress
Setting specific goals can help you stay focused and motivated during your DIY dumbbell workouts. Whether your goal is to increase strength, build muscle, or improve overall fitness, it is essential to define clear objectives. Consider setting both short-term and long-term goals and track your progress regularly. You can measure progress through factors such as increased weight lifted, improved repetitions, or changes in body measurements.
9.2 Gradual Weight Increase
As you become more comfortable with your DIY dumbbell workouts, it is important to gradually increase the weight to continue challenging your muscles. Progressively adding more weight stimulates muscle growth and strength development. Start with lighter weights and gradually increase the load as you feel capable and maintain proper form. Avoid drastic weight increases that may compromise your technique and increase the risk of injury.
9.3 Cross-training and Supplementing
While DIY dumbbells can provide a versatile range of exercises, it is beneficial to incorporate cross-training and supplementing into your fitness routine. Cross-training involves engaging in different forms of exercise, such as cardio, bodyweight exercises, or yoga, to prevent plateaus and stimulate overall fitness growth. Additionally, consider supplementing your DIY dumbbell workouts with other fitness equipment or classes to add variety and challenge your body in different ways. Exploring different workout methods can keep your fitness journey exciting and prevent boredom.
10. Benefits and Limitations of DIY Dumbbells
As you weigh the decision to embark on a DIY dumbbell project, it is important to consider the benefits and limitations they offer. In this final section, we will explore the cost savings and affordability of DIY dumbbells, the space constraints and portability, and the safety considerations and risks involved.
10.1 Cost Savings and Affordability
One of the key advantages of DIY dumbbells is the significant cost savings compared to purchasing commercial dumbbells. By using readily available materials and repurposing containers, you can create functional dumbbells at a fraction of the cost. DIY dumbbells are an affordable option, especially for those on a budget or looking to optimize their home workout setup.
10.2 Space Constraints and Portability
Another consideration when choosing DIY dumbbells is the space constraints and portability they offer. DIY dumbbells can be customized to your space requirements, allowing you to create equipment that fits your available area. Furthermore, DIY dumbbells are often portable, making them suitable for those who need to transport their workout equipment or have limited storage space. Whether you are exercising at home, in the office, or on the go, DIY dumbbells can be easily accommodated.
10.3 Safety Considerations and Risks
While DIY dumbbells are a cost-effective and accessible option, it is crucial to prioritize safety at all times. DIY dumbbells may not have undergone the same testing and quality control as commercially available ones, which can introduce potential safety risks. It is important to take necessary precautions, such as regular inspections, proper maintenance, and using proper form, to ensure your safety during workouts. Additionally, understanding your fitness limitations and incrementally increasing weights will help minimize the risk of injuries.
In conclusion, making DIY dumbbells on a budget can be a fun and rewarding project that allows you to create personalized fitness equipment. By selecting the right materials, following step-by-step instructions, and taking safety precautions, you can enjoy efficient and effective workouts from the comfort of your home. Remember to start with lighter weights, gradually increase the load, and track your progress to continually challenge yourself and achieve your fitness goals.